

Sirpent
-
Posts
2,401 -
Joined
-
Last visited
-
Days Won
22
Content Type
Profiles
Forums
Gallery
Events
Articles
Media Demo
S30z Register
Store
Everything posted by Sirpent
-
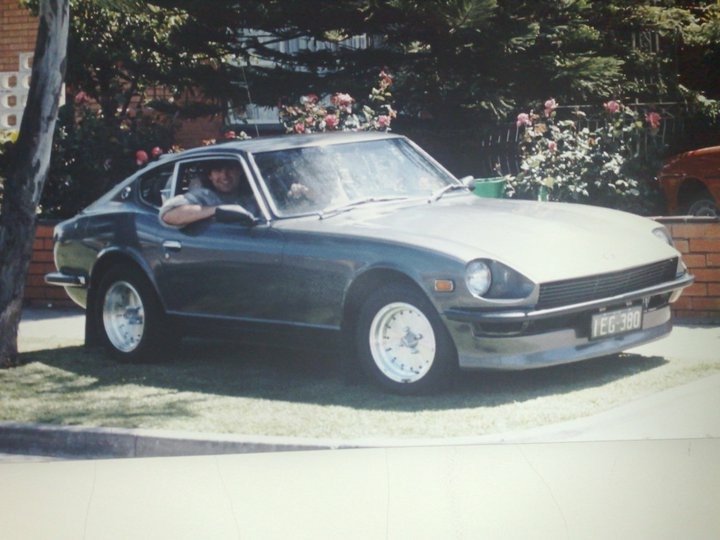
Thanks ZZZ and Zedevan, ZZZ youre right of course, I will be lowing the car, but Im going to keep the nose a reasonable height also, will probably use the speed hump down the road a s a guage. LOL Zedevan, Cant give away all my trade secrets but the pics I post once I start will explain every step, when I say from scratch, I mean from scratch, I wont be using a doner lower half, rather build up a base then work fibreglass over the top, after its all done I will send it back to ALFA as a complete single assy and get Fraser to produce a female mould then have a carbon fibre final made up, never know Fraser may like it enough to start producing them. As for the lamps, Im going to run normal H4's with the parker lamp provisions, and I like the look of either the later model integra parkers which I will use as turn signal / repeaters as the shape is almost perfect. The Aston link you posted looks great, but I dont want to go too far with the fron, still want to keep it retro considering the rest of the car. By the way, our cars must be pretty close in build date and number as mine was the same color originally and the rego (I still have) is IEG-380. Cheers John
-
Thanks for the thumbs up Garvice
-
Post Note, Took a few minutes to quickly morph the two together, think this will work and give ppl a better idea. Cheers John

-
Hi all, Well while the body is getting to the final pre-paint stages as far as repairs and dressing up of the main panels, I decided to contact Fraser at ALFA MOTORSPORT FIBREGLASS to discuss the "G" nose for my "Z" and happy to say I have ordered an upper section which will take a few weeks to make up. I've decided to go for a Hybrid more contemporary "G" nose look, so I will be grafting or rather creating a lower section which will be along the lines of the lower part of Porsche-Carrera-GT pictured to create a bumperless one piece nose using Frasers upper section pictured also. Wish me luck, and once again, any and all opinions appreciated and respected. Cheers John
-
Yeah sorry, to early in the morning
-
Hi Gav, My email must never had made it as I just checked and my car isnt coming up. Cheers John
-
Hey Craig, Thanks for your efforts, didnt mean to cause you any grief by the post. Cheers John
-
P.S. Re the false info, if one was set up here, think each member uploading would need to post a pick of the compliance/production plates ?
-
Gav, I do a lot of MS Access data base development for work, if I could create one, could you upload it? Cheers John
-
Your on, Tassie 2011, first one across to the mainland ? Jane? dont understand?
-
Hi all, Just a though, when I first joined this forum one of the first things I did was to register my "Z" on the W.A. register as requested, thing is 5 months later nothings happened, my details still havnt appeared, so I was thinking why dosnt this forum keep one ? Stupid idea maybe, but seems the boys in W.A. have lost interest in theirs. John
-
I ve got the HDMI cable ready to hook up to the 50" LCD and surround sound !!!!!!!!!
-
I may not catch your Zed in a straight out road race when they are both finished, but I'm going to stay on your tail all the way during our restores Mick, so keep an eye on your rear view mirror.......LOL By the way, where is Jane these days?
-
Hmmmmmmmmmm, So looks like this is a race now considering we are both at the same stage, have to pull my finger out now and start puting in some overtime too....LOL hey great to hear you are well and the "Zwd's" progressing buddy. John
-
Mick, You still alive?
-
Only checked out this build post a few days ago for the first time and have to say way better than any V8 conversion, this heads to the top of the list and replaces MAGZ28's M104 Benz head conversion in the States, hope you post some vid's in the future once the Beast breathes life. John
-
 Love yer work, and have to admit, the first pics of the color didnt do it justice, the sneak shots of the flares really give it a different feel and look, Congrats.......... John
 -
The Brown Hornet - as NEW 1971 240Z - SOLD
Sirpent replied to acf321's topic in Members Project(s) Journal
Fantastic Results ! Dreaming of the day when I get close to where you are Cheers John -
Have loaded a few photo sets now onto flickr as follows Full Body Shots http://www.flickr.com/photos/42220364@N06/sets/72157622276699688/detail/ Engine Bay http://www.flickr.com/photos/42220364@N06/sets/72157622151436625/detail/ Inner Floor http://www.flickr.com/photos/42220364@N06/sets/72157622152276777/detail/ Undercarriage http://www.flickr.com/photos/42220364@N06/sets/72157622169771549/detail/ And the rails which show the only rust repair section I needed to complete to the drivers side rear, and a clean up of the front rails by stitch welding fabricated skid plates to both the drivers side and passanger side rail halves between the jacking plates mid rails to the forwad ends. http://www.flickr.com/photos/42220364@N06/sets/72157622294624836/detail/
-
Hi All, Have created a file of Flicker, and have loaded the first set of photo's showing the engine bay, will progresively upload pics during the process from start to end showing all progress until the car is turn key, the same will go with the other area specific files I upload in the next day or so. Enjoy, and all comments good or bad welcome. John http://www.flickr.com/photos/42220364@N06/sets/72157622151436625/detail/
-
Hey Guys, Thanks for the positive comments, feels good to get a reaction, its lonely at times working on a project by yourself and comments good bad or indifferent all have a positive effect by either re-enforcing what you are doing or making you re-examine the path you take before it's too late. It was a combination of garnite and soda, basically the entire undercarriage, engine bay, inner area tail lamp panel inner skirts and tubs were done with garnite, then the 1/4's and roof where done with soda, the effect of the garnite leaves a surprisingly matt but minimal pitting effect, if you look at the left hand inner skirt you will notice what look like brown spots, this is where I used a scotchbrite wheel on a hand grinder to take off some material the blasting missed and they are actually very polished sections now but for some reason the reflection of the flash made them look brown. Through out the pics you will notice small dark specs, these are material residual the blasting missed however come off pretty easily with a bit of spot treatment with the scotch pad. All I will be doing is cleaning up these areas then I will use a surface cleaner like prepsol to desolve any soda film left, after that I will re-seal all the panel seams with urethane beads and then apply something I came across that I even suprised myself with "Plasti-Dip" Plasti Dip is the material you can buy in small quantities thats used to dip the handles of hand tools into to create a grip surface, great thing about it is it loves going straight onto bare metal, can be purchased in 10 litre cans and is sprayable, I intend sealing all the floor pan, inner skirts and tubs with it and the retailer reckons it will never chip, totally water proof the surface and soundproof the structure. With the soda blasted panels, you will see that the left hand rear 1/4 is a lot more reflective, the guy who did the blasting recommended I go over it with sandpaper before applying anything on it and using a prep wash also, I ran the "Scotch brite" pad over it also and the surface is incredibly smooth and reflective, the swirl marks are minute and a result of the rotary action of the machine. The rest of the car still has a soda film over it and I will leave it as is until Im ready to prep the panels for refinishing as it offers a degree of moisture resistance. As far as the mess, I ended up spending 2 days sweeping vacking and shoveling over 175 kg's of material that went through the blaster, if you attempt this try to do it outside. PPL will probably notice that the rear of the inside hatch area is still in the cars original duco green color, I decided to stop the blasting at the centre floor bulkhead juncture as the paint here is in great original condition and Im just going to prep it with a thinners and scotch brite wash then finish the area off with the rest of the interior panels in a black enamel. The battery area is as you see it, there are some small drill holes from drilling out the spot welds and some very minor rust pitting in the metal that I have to weld up, I saved the tray which is intact and in perfect condition, but as I said before the bay is going to be wireless, and the battery stored in the rear of the car out of site along with all the electrical components and fuse box then I will run looms through the sill panels up the insides of the hinge pillars and through the air galleries of the upper skirt re-enforcements to the the headlams and various connection points on the motor via the openings where the radiator plastic feed ducts were. Im not going to be using the side aircon dust any longer as Im installing a factory aircon set up I came across on here from one of the members. Hopefully I will have the 50 odd pics up on a web page I will post the link to in this thread, I took pics of every rust prone area on the car so as when its done the insurance company can appreciate its condition prior to restoration and also in case I ever go to sell it, which I doubt will happen while Im around.
-
Thats it Lurch, guess the 3 hail Mary's before he started blasting away must of helped.
-
Pic #6
-
Pic #5 Worst of the rust, actually about all there was apart from a couple of pin hole sized ones, this is on the rear end of the passenger side rail.
-
Pic #4


