

MrKaos
-
Posts
78 -
Joined
-
Last visited
-
Days Won
2
Content Type
Profiles
Forums
Gallery
Events
Articles
Media Demo
S30z Register
Store
Everything posted by MrKaos
-
From the album: Johnnys Zed Restoration - Interior Cleanup
Masked off while I finished the interior areas. -
From the album: Johnnys Zed Restoration - Interior Cleanup
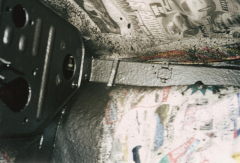
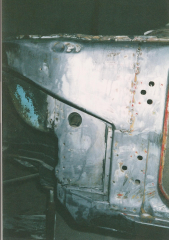
No bitumen sheets to be seen, I'm sure this has lightened the car up somewhat. The frame rail welds are obvious on the passenger side (both sides were replaced). and the tops of the wheel arch have had some mounting points for seat belts included to give me some extra options about holding me in the car. The slag has some sound deadening properties, but I found a light weight fire retardant sound and heat insulator to use instead, which also doesn't hold water. -
From the album: Johnnys Zed Restoration - Interior Cleanup
You can see the second coat of slag in the wiper motor bay, and onto the wheel arch in the interior. -
From the album: Johnnys Zed Restoration - Interior Cleanup
You can see the absence of any of the bitumen, it was pretty heavy too. if you look at the top of the photo you can see where the welds for new frame rails. The schtien slag was still dry/hardening. -
From the album: Johnnys Zed Restoration - Interior Cleanup
Even though I intend to use silicon brake fluid I've slaged under areas that may get brake fluid on them in the engine bay. Oh, did I mention that the frames rails were replaced with new items and that they were galvanised before being welded in. -
Johnnys Zed Restoration - Out of the Paint Shop
Images added to a gallery album owned by MrKaos in Member Gallery
-
-
From the album: Johnnys Zed Restoration - Out of the Paint Shop
I'm surprised these photos turned out as good as they did, seeing them I can;t wait to give the car a good clean-up and then see what it looks like. -
From the album: Johnnys Zed Restoration - Out of the Paint Shop
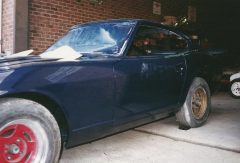
Ok, now you can see how hard I worked on making sure the car was smooth, and if you look on the wing you can see the dirt too. Notice the lack of an antenna hole? I'll put that in the G-nose, and you can see the rear wheel arches turned out pretty good. -
From the album: Johnnys Zed Restoration - Out of the Paint Shop
You can see why I spend so much time in the preparation stage, it reaps rewards in the finished product. The thing you can't see in these photos is how dirty the car was when I took these pictures. -
From the album: Johnnys Zed Restoration - Out of the Paint Shop
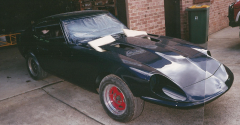
I've always loved these cars since I was at high school. I bought my first Zed when I was 21. The car was painted in a 2K Lapis Blue, a BMW colour. When I saw it come out of the shop I felt like that kid at high school again. Such fun cars!!! -
Johnnys Zed Restoration - BodyRepairs
Images added to a gallery album owned by MrKaos in Member Gallery
-
-
From the album: Johnnys Zed Restoration - BodyRepairs
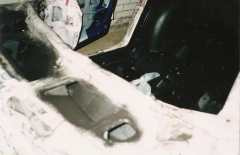
This Z suffered rust in the wheel arches, so they were reshaped very very subtley. First the original arches were removed and body maker remade the arches in metal. I wanted to fit 16 or 17 inch rims by 8inch wide, but still hard to tell if any modification had actually been performed. You can also see the bottom of the G nose and the remaining bitumen. I can't believe how much bitumen was on this car. -
From the album: Johnnys Zed Restoration - BodyRepairs
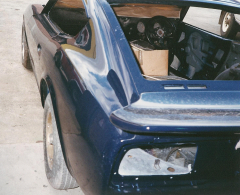
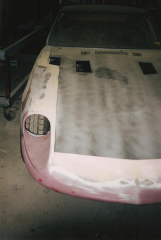
You can see in this picture the black guide coat I used. Standard proceedure, and fun with a long board, I have an air powered long board but the finesse of a manual longboard cannot be beaten. You can see the wing is now fully repaired, I cut out the bumper mounts and welded up the holes for that smooth tail. -
From the album: Johnnys Zed Restoration - BodyRepairs
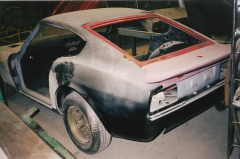
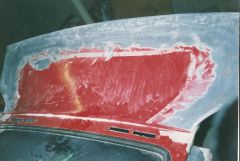
Nothing like sanding those Zed lines smooth. I had intended to stitch these two images but I haven't had time to work out the lense angles, you probably get the idea though. Attention to detail is the motto with projects like this (the forth car I've done) especially when preparing the body. Soon your hands can pick up the smallest inperfection. -
From the album: Johnnys Zed Restoration - BodyRepairs
almost 40 years of wear and tear on this Z showed. After the welds were completed it was time to get those lines smooth again and do some little tricks to the body. When it's painted a careful observer may note some very very subtle body modifications. Like this G nose ;-) -
Johnnys Zed Restoration - The Beginning
Images added to a gallery album owned by MrKaos in Member Gallery
This was the beginning of the restoration. I tidied up the body and welded up 'that which needed welding'. All the crappy bitumen was stripped of the body, before heading off to the paint shop the interior of the car was stien slagged. -
-
From the album: Johnnys Zed Restoration - The Beginning
I had to keep the drive train in, the engine and wheels in so I could move it around. This dictated how things were cleaned up and painted. -
From the album: Johnnys Zed Restoration - The Beginning
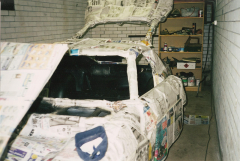
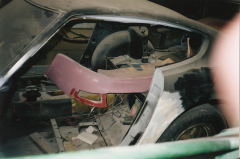
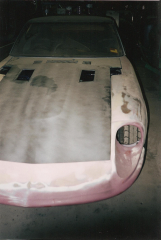
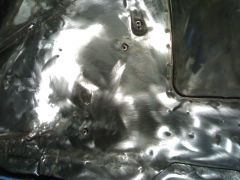
a close up of the strip back of front end and door mount area prior to repairs and painting. -
From the album: Johnnys Zed Restoration - The Beginning
I wanted to make sure that the parts that won't be seen get a good clean up ready for repairs and schtien slaging. You will notice that the engine is still in there - which I just had to put up with - later it was removed so I could complete the engine bay and transmission tunnel. time time time -
From the album: Johnnys Zed Restoration - The Beginning
I did a lot of preparation striping back the whole car and identifying where rust repairs had to be done. After the Welding was done the body was flattened out. -
From the album: Johnnys Zed Restoration - The Beginning
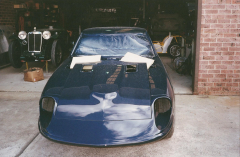
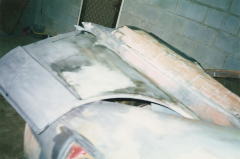
Yes, it's a big wing on a Z, but I kinda like it. Unfortunately they can get damaged and split down the middle - so this wing has been reinforced by layering fibreglass over the critical area and allowing a long cure time. -
Johnnys Zed Restoration - Belly restoration
Images added to a gallery album owned by MrKaos in Member Gallery
These are some pictures of my complete frame-up restoration of one of the first Z cars bough into Australia. It was first registered in 1969. -
-
From the album: Johnnys Zed Restoration - Belly restoration
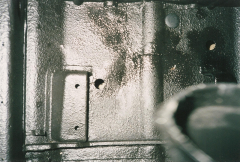
This is what a Zed looks like nude, shiney metal all welded and happy. From the looks of it after stripping you can see where some of the original pop rivets get tired and crack loose. All these were re-welded. After this the car was primed, stien slaged, primed and painted -
From the album: Johnnys Zed Restoration - Belly restoration
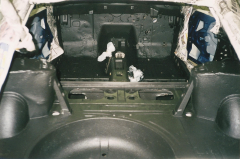
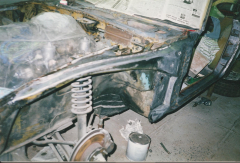
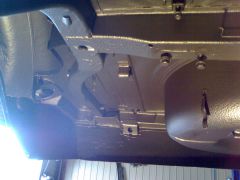
My head is where the diff should be. Everything was removed so I could strip the bottom of the car - a big dirty job. This photo was taken before the under side was primed and painted black. -
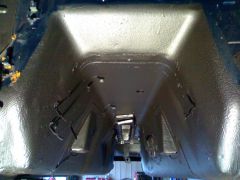
From the album: Johnnys Zed Restoration - Belly restoration
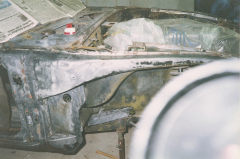
from inside the engine bay, looking down the transmission tunnel to the rear of the car. This is prior to final painting of the underside and the engine bay.


